Whether you’re a Bluebeam beginner or a seasoned expert, we all have gaps in our knowledge. Tuesday Tidbits will help you fill in those gaps. Every Tuesday, I’ll teach you simple techniques that you can learn in under 10 minutes and implement immediately to improve your workflow.
Intro
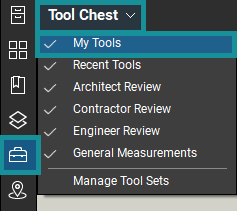
Bluebeam comes with some default tool chests, and you can even make your own tool chests (we’ll go over that later in a longer post). But did you know there’s a personal tool chest that let’s you have keyboard shortcuts for your favorite markups? These can be a single markup or a group of markups and will retain whatever properties they have when you add them to your tool chest.
If you’re someone who uses Bluebeam Profiles (we’ll also go over that in another post), My Tools does not change if you switch to another profile. I like this feature because if your company uses profiles, you can still have your own tool chest with the items that are most useful to your workflow regardless of what changes the powers-that-be decide to make. No one else can edit it except you.
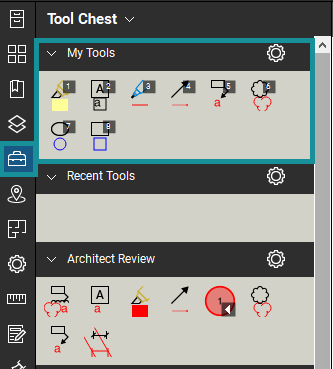
Finding “My Tools”
My Tools can be found at the top of the tool chest tab. If you don’t see it, click on the Tool Chest dropdown, then click on My Tools.
What makes My Tools unique from the other tool chests is that each tool has a keyboard shortcut. This allows you to keep your most favoritist (that’s a word, right?), most commonly used markups literally at your fingertips.
Modifying “My Tools”
Adding New Tools
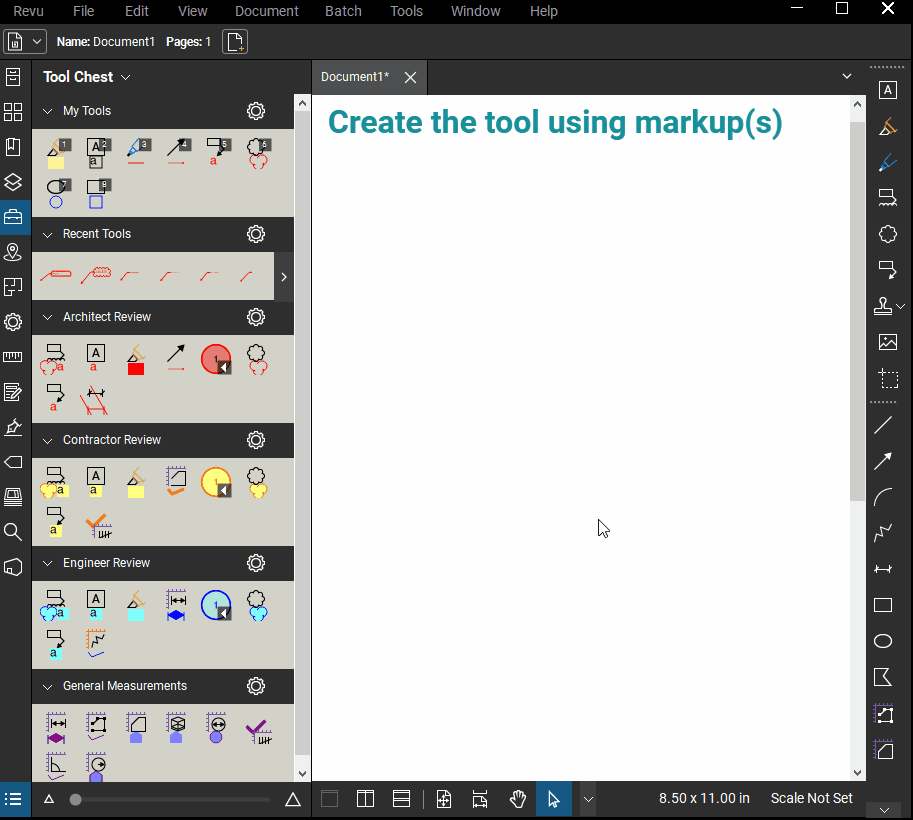
The general process for creating and adding tools to any tool chest is:
- Use markups to visually create whatever you want your tool to look like. Change any line type, text, color properties, etc… that you want in the final product.
- If your tool contains multiple markups, group them together. Select all markups that will be part of the tool, then use CTRL+G or right-click 🠖 Group.
- Add the tool to My Tools by right-clicking 🠖 Add to Tool Chest 🠖 My Tools (or whichever tool chest you want).
Deleting Tools
To delete a tool from a tool chest, just right-click on the tool and select Delete.
Switching Between “Drawing Mode” and “Properties Mode”
There’s something neat you can do if your tool is just one single markup (ie not a group of markups): you can switch between what’s called “Drawing Mode” and “Properties Mode”.
- “Drawing Mode” adds the markup to the page exactly as you originally drew it. It’ll be like you clicked copy and paste.
- “Properties Mode” creates a markup with the same properties only, but you’ll be able to freely place the shape and text (if it has text).
In the GIF below you can see the difference between these two modes. To switch between them, simply double click on the tool in the tool chest. You’ll see the icon change a little bit. Try this out a few times with different styles of markups to get the hang of it.
Please ignore that my gibberish text starts with the word “sad”. If I’m being honest, I left this post until the last minute and I don’t have time to change it right now. Also, I might keep it because I think it’s funny.
Rearranging Tools and Updating Shortcuts
You can rearrange items within tool chests by clicking and dragging a tool into a new spot within that tool chest.
To change the keyboard shortcut for anything in My Tools, click and drag the tool into the desired location within the My Tools tool chest and the keyboard shortcut will update appropriately. To my knowledge, these cannot be modified beyond the sequential 1, 2, 3… numbered shortcuts. For example, the first tool in My Tools will always have a keyboard shortcut of 1. If anyone know if it’s possible to change this, let me know if the comments!
Conclusion
If you find yourself using the same several markups over and over again, try putting them in My Tools. You’ll have a tool chest that’s unique to you that your Bluebeam admins can’t edit, plus you’ll get keyboard shortcuts. And who doesn’t love keyboard shortcuts?? (Shout-out to my coworker who despises right-clicking or selecting anything on the toolbars. I see you.)
So did you already know this tip? If you did, is it something you use a lot? If you didn’t, come back and let me know how you like it after a few days of testing it out. Let me know in the comments!
Pingback:Double Click to Reuse Markups – Bluebeam Tips and Tricks
I used the single keystroke shortcut recently when I was highlighting a multi item material quote as I was entering the data into our estimating software. I moved the highlighter tool up into the “1” spot so every time I needed to use it it was only a “1” stroke away. Big timesaver over having to pick it off my toolbar every time!
Pingback:Stop Constantly Changing the Same Markup Properties… By Default! – Bluebeam Tips and Tricks
Pingback:Copy Markup Properties (aka Format Painter) – Bluebeam Tips and Tricks
Thanks for the info. I really wish they would allow keyboard shortcuts for all tools in the chest. Or that they built an exclusive Streamdeck plugin.
I haven’t tried looking into how many tools can be added to the My Tools tab, but numbered shortcuts are reserved for that tab. On the bright side, you can organize them in any order you want, and if you have more than 9 tools in it, you just type the number for the tool you want. So, if you have 13 tools, the 13th shortcut is 1-3. Simple as that.
I know someone who has tried over 100 just to check, and it did work. So I’m really not sure if there’s a limit. If you can type the number quickly and if you can remember 100 shortcuts, more power to you!
I’d like to express my appreciation to Liz for her guidance and help and for developing my abilities with bluebeam. Thanks Liz…
I’m so happy to hear my tips and tricks have helped you! I love sharing my knowledge with others 😀