Whether you’re a Bluebeam beginner or a seasoned expert, we all have gaps in our knowledge. Tuesday Tidbits will help you fill in those gaps. Every Tuesday, I’ll teach you simple techniques that you can learn in under 10 minutes and implement immediately to improve your workflow.
Intro
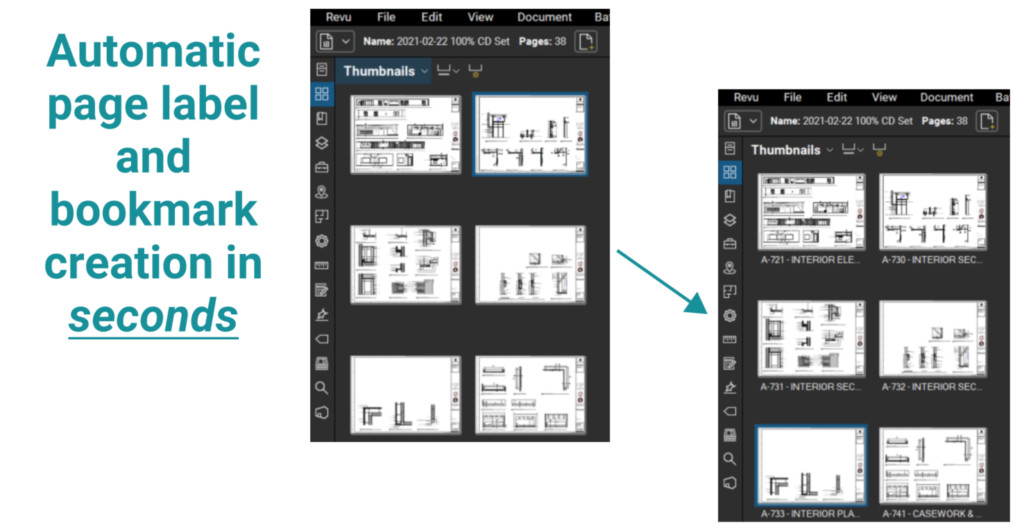
If you’re making bookmarks or page labels manually, one-by-one, I’m about to save you so much time. You can automatically create page labels and bookmarks from text already on the page. Most likely this would be from a title block, but this method can be used whenever there is text in a consistent location each sheet in a document.
This even works on scanned documents. It’s amazing. Be prepared for this to take a while, though, on poor quality scanned documents with tons of pages. Perhaps you should go get a cup of coffee while you wait.
If you have bookmarks already setup, you can instantly create page labels from those, or vice versa!
And be sure to scroll all the way to the bottom for a bonus tip! Yes, this is absolutely me trying to get you to look through the whole post (but seriously, bonus tip at the bottom).
Creating Bookmarks or Page Labels from Page Regions
You can start by creating either bookmarks or page labels. In this example, I’ll start with bookmarks.
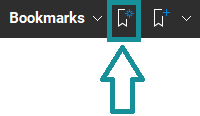
- Click on the bookmarks icon
 (by default it’s in the top left for version 2018 and newer).
 - Click on the icon with the little sunburst symbol on it (maybe it’s a shiny symbol? I’m not sure).

- Select Page Region and then click the Select button..
- Drag a rectangle around the text you want in the bookmark.
- Tip: Think about how much text could be in that location on other pages. Draw a large enough rectangle to capture that entire text area.
- In the text box, add any separators you’d like. For instance, you can add a dash “ – “ separator between sheet number and sheet name.
- Continue clicking Add and adding text separators until you have all the relevant text regions.
- Click OK and wait for the magic to happen.
Creating Page Labels from Bookmarks (or vice versa)
Once you have bookmarks set up, you can go into page labels and click the little starburst/shiny icon and this time click Bookmarks instead of Page Region. Click OK and BAM! you’ve got page labels.
Like I’ve mentioned already, this works vice versa. So this is a great trick if you receive a PDF with one or the other already set up.
One thing to note: if the bookmarks were made from the Revit Bluebeam plugin, you might have to fiddle with the bookmarks slightly to get them to become page labels.
- Select the first bookmark.
- Hold SHIFT while selecting the last bookmark.
- Drag the bookmark group so it’s no longer nested under the Sheets bookmark.
- Delete the Sheets bookmark via Right-click 🠖 Delete.
BONUS TIP
You can create sequential page labels from numbers or letters, including roman numerals. Select the pages you want to label, then click Thumbnails 🠖 Number Pages. Then select the style, starting number, and add a prefix if you want.
Let’s say you have a concrete specification and you’d like to create page labels for it. It might look something like this:
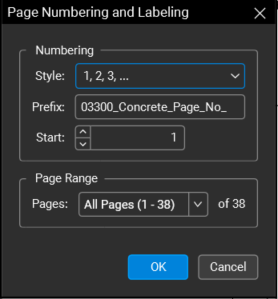
Bluebeam will sequentially add a number to the end of the text entered in the Prefix field. You can always leave that field blank, too.
Conclusion
Now that you know this tip, you’ll be able to save a ton of time and impress your coworkers with your sweet Bluebeam skills. Plus, everyone opening your documents will be super happy that they’re easy to navigate.
Thanks for reading this far and let me know in the comments if you find this tip useful!
Pingback:Finding Section Cuts on Plan – Bluebeam Tips and Tricks
Pingback:Quick Sequential Page Numbering – Bluebeam Tips and Tricks
Pingback:Reverse Stapling (Unstapling?) – Bluebeam Tips and Tricks
Pingback:Fast-Track Your MIDP Quality Checks with Bluebeam Bookmarks – digitalBBQ