Whether you’re a Bluebeam beginner or a seasoned expert, we all have gaps in our knowledge. Tuesday Tidbits will help you fill in those gaps. Every Tuesday, I’ll teach you simple techniques that you can learn in under 10 minutes and implement immediately to improve your workflow.
Intro
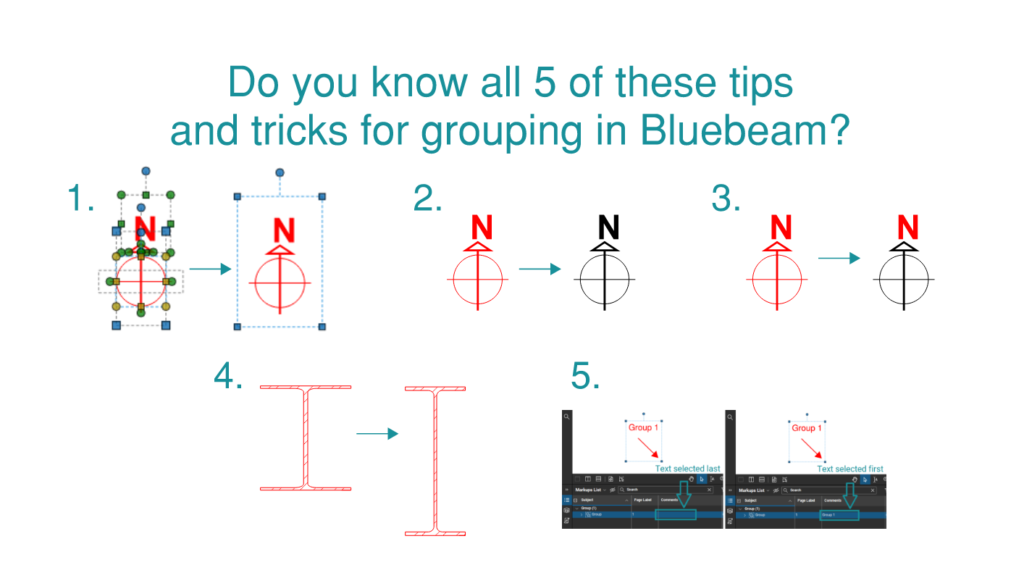
Grouping markups in Bluebeam is a great way get those markups to behave as one item and to consolidate your markups list. Today we’ll go over 5 things you need to know about groups to get the most out of this feature:
- Grouping and ungrouping
- Changing the properties of a group
- Editing individual markups within a group (without ungrouping)
- Changing the aspect ratio of a group
- Grouping order matters (kind of)
Grouping and Ungrouping
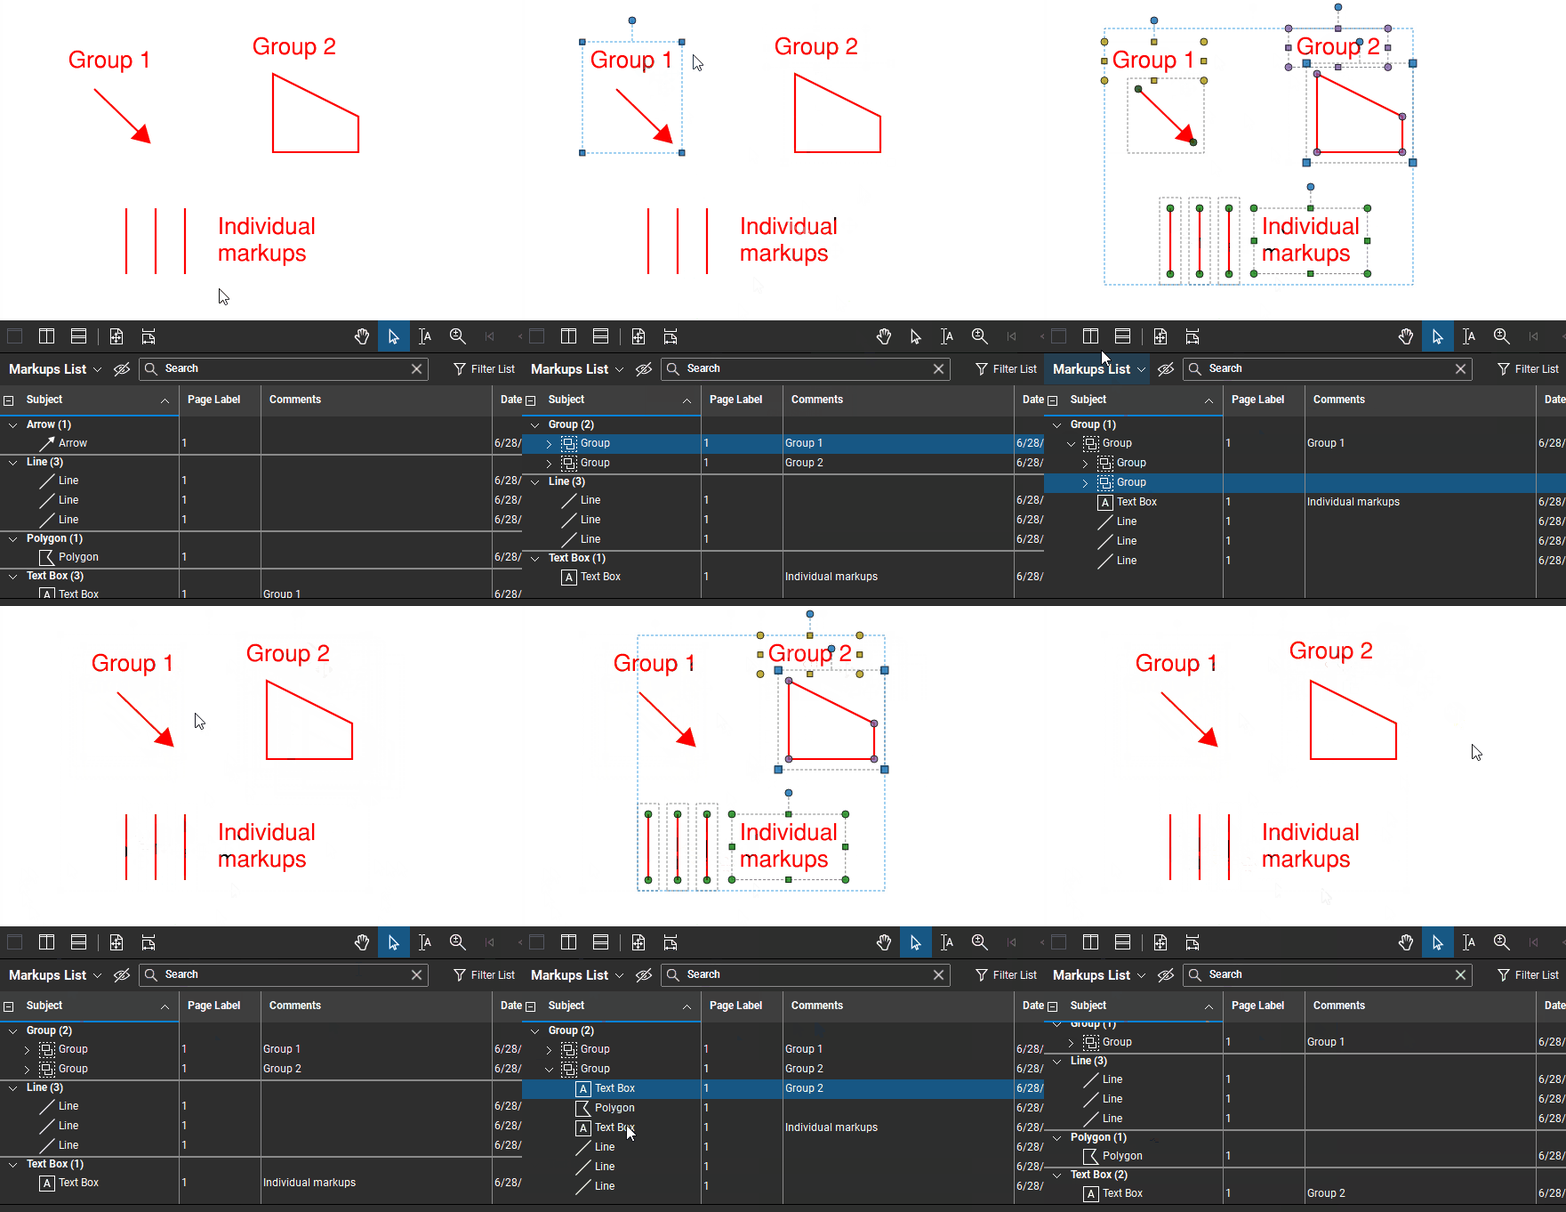
Starting off with the basics, you can group and ungroup using two different methods:
- Keyboard shortcut
- To group the currently selected markups, CTRL+G
- To ungroup the currently selected group, CTRL+SHIFT+G
- Right-click → Group or Ungroup
Some additional things to note when grouping groups:
- If there is only one group plus a bunch of additional markups selected, the additional markups with become part of the group.
- If there are multiple groups selected, the groups plus any additional markups will be nested within the main group. Then if you ungroup, the original sub-groups will remain intact, the individual markups will remain individual markups.
Changing the Properties of a Group
Anytime you select a markup in Bluebeam, the properties at the top of the window dynamically change to show you only what’s relevant to the currently selected markup.
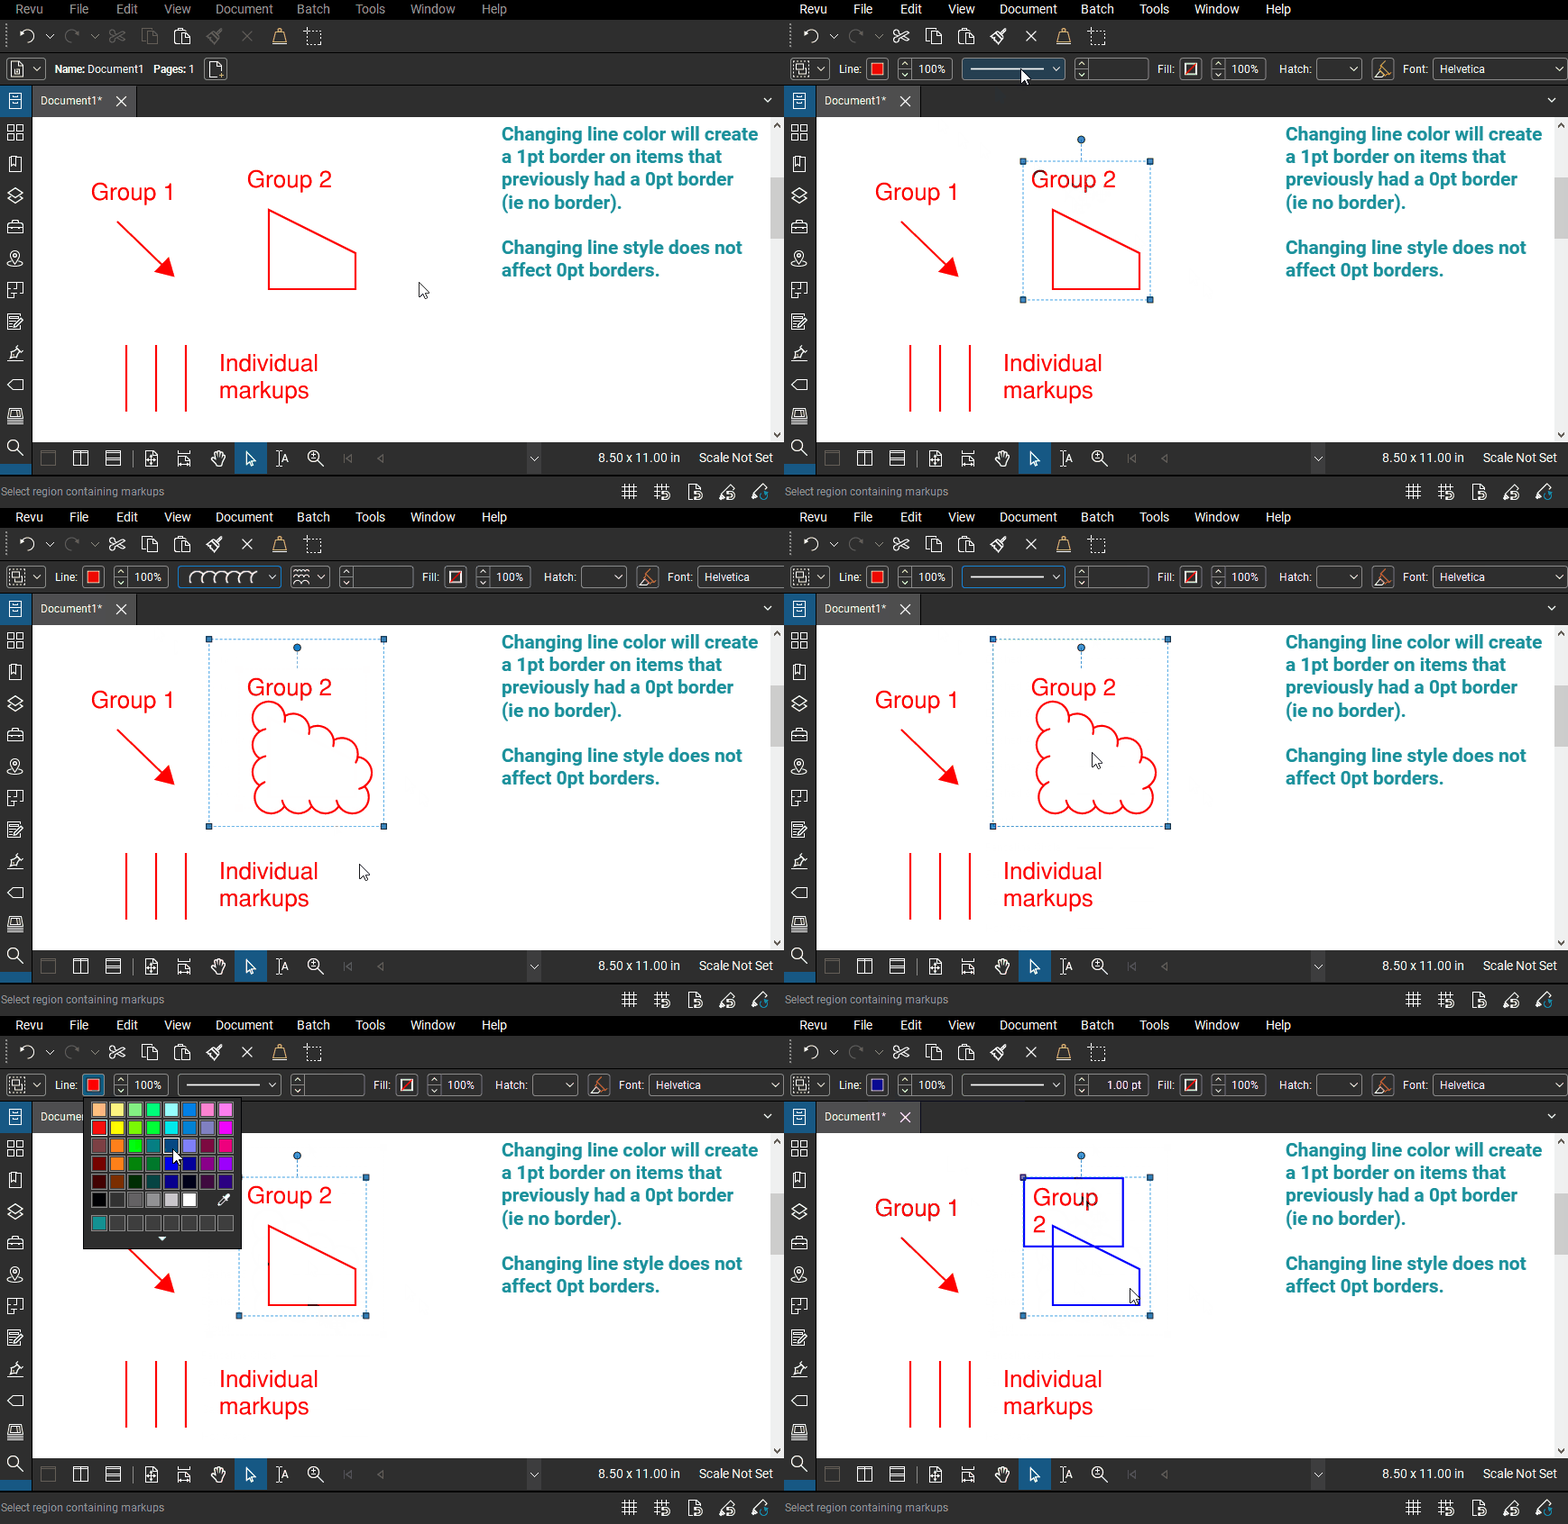
In groups, however, the properties will update to show you all the properties for all markups in the group. And any property you change will update every single markup in that group.
This is generally a good thing, but most notably it can be a pain when it comes to the line color. Editing the line color property of a group will give every single markup in that group that border color, even if they previously didn’t have a border at all. Items that didn’t have a border before (ie they had a zero lineweight) will be given a border with a lineweight of 1.00 pt. This does not happen when applying a line style, though.
Editing Individual Markups Within a Group (Without Ungrouping)
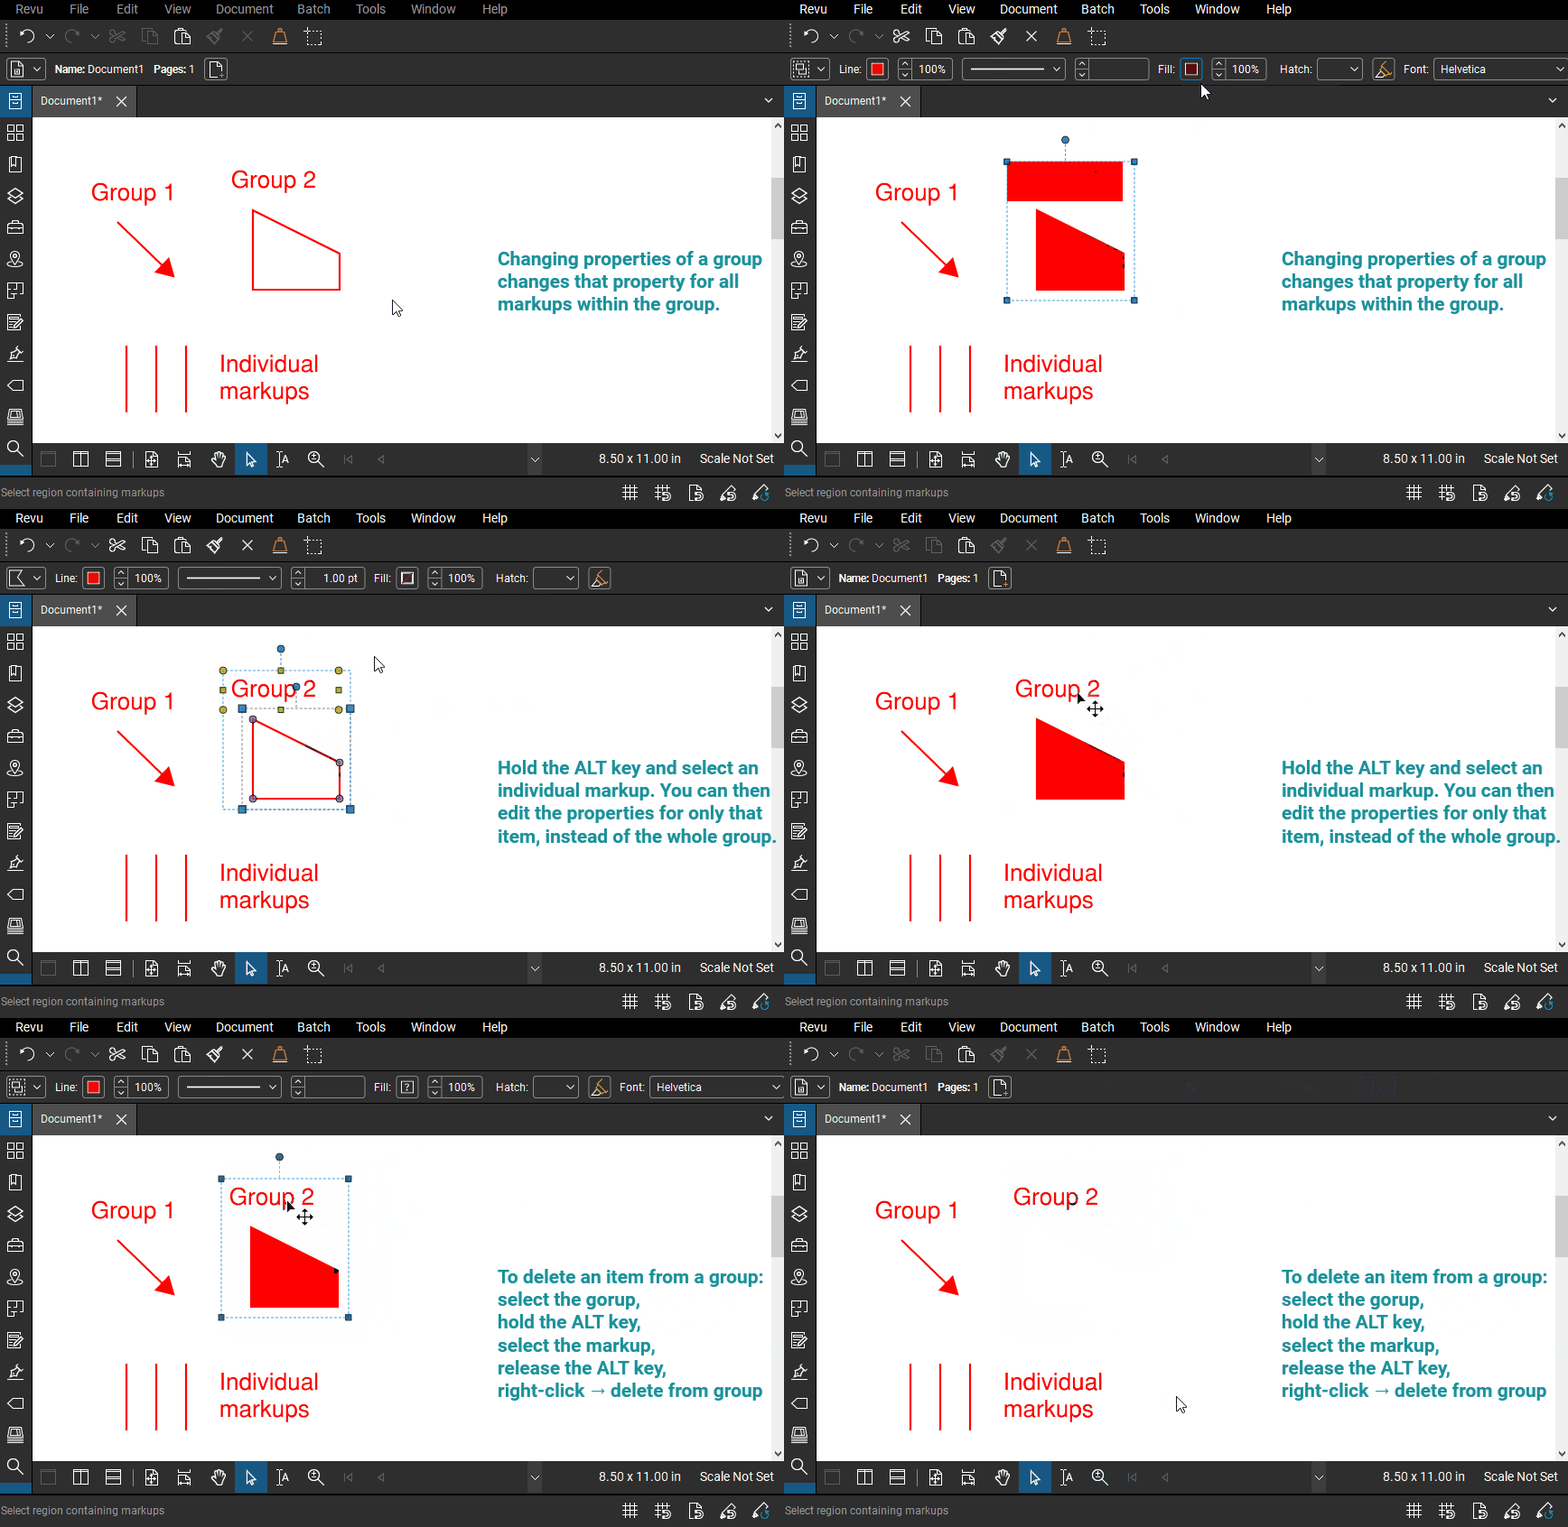
But what if I don’t want every single markup in a group to be updated when I change the properties? Well, Bluebeam allows you to edit individual markups in a group without needing to ungroup first. This applies to both markup properties and editing the little grippys to change size and orientation of markups within the group.
- Select the group.
- Hold the ALT key.
- Click on the markup you want to change the properties for. Its grippys will turn purple.
- Any changes made in the properties will only affect the markup with the purple grippys.
You can even delete individual markups:
- Select the group.
- Hold the ALT key.
- Select the markup you wish to delete.
- Release the ALT key.
- Right-click on the markup you want deleted→ Delete ___ From Group.
What the GIF below for clarification.
Changing the Aspect Ratio of a Group
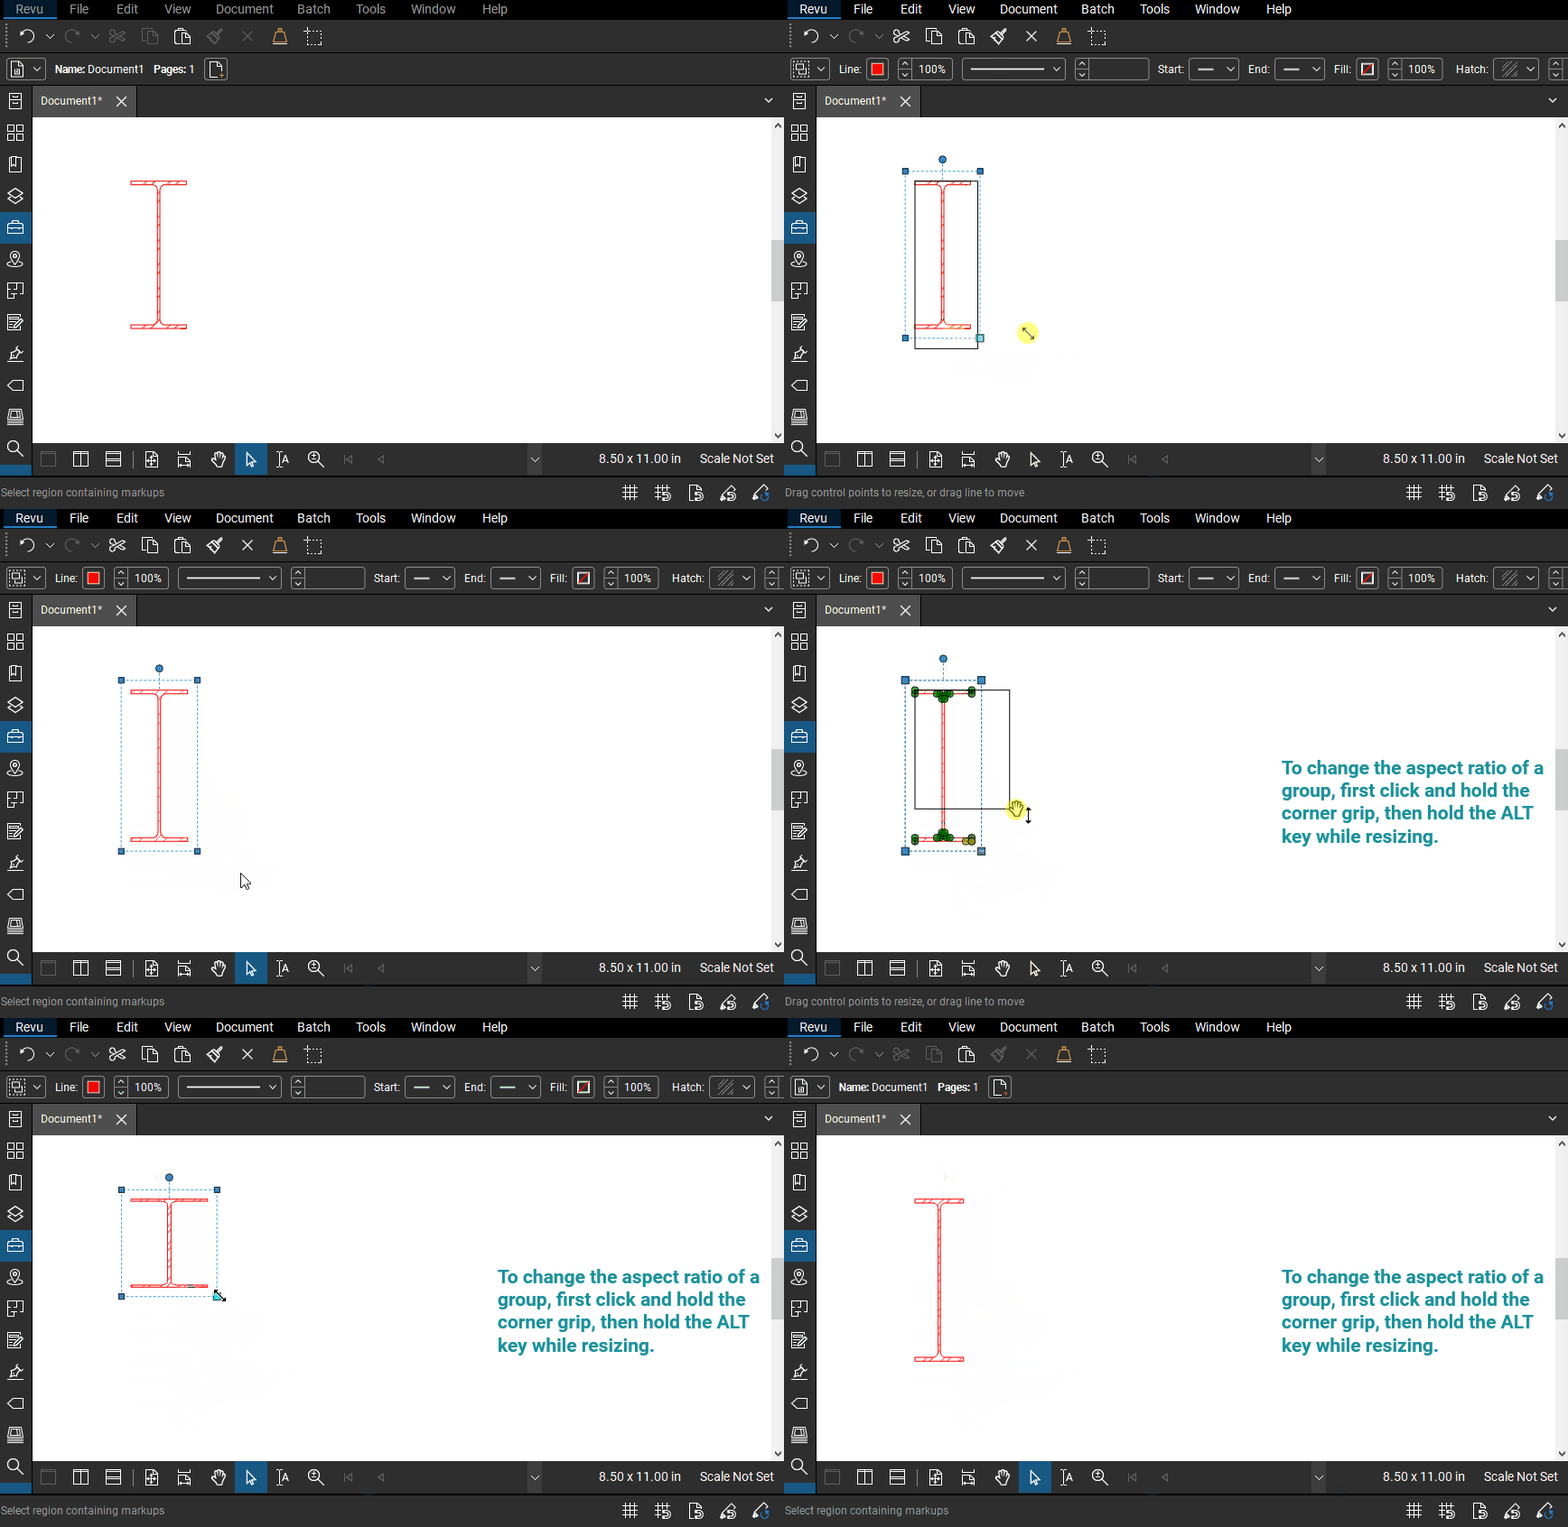
When you try to resize a group, you’ll notice the group wants to maintain its original aspect ratio. Sometimes this behavior isn’t what you want.
To independently change the length and width of a group, simply hold the ALT key then grab the corner grippys to resize.
Grouping Order Matters (Kind Of)
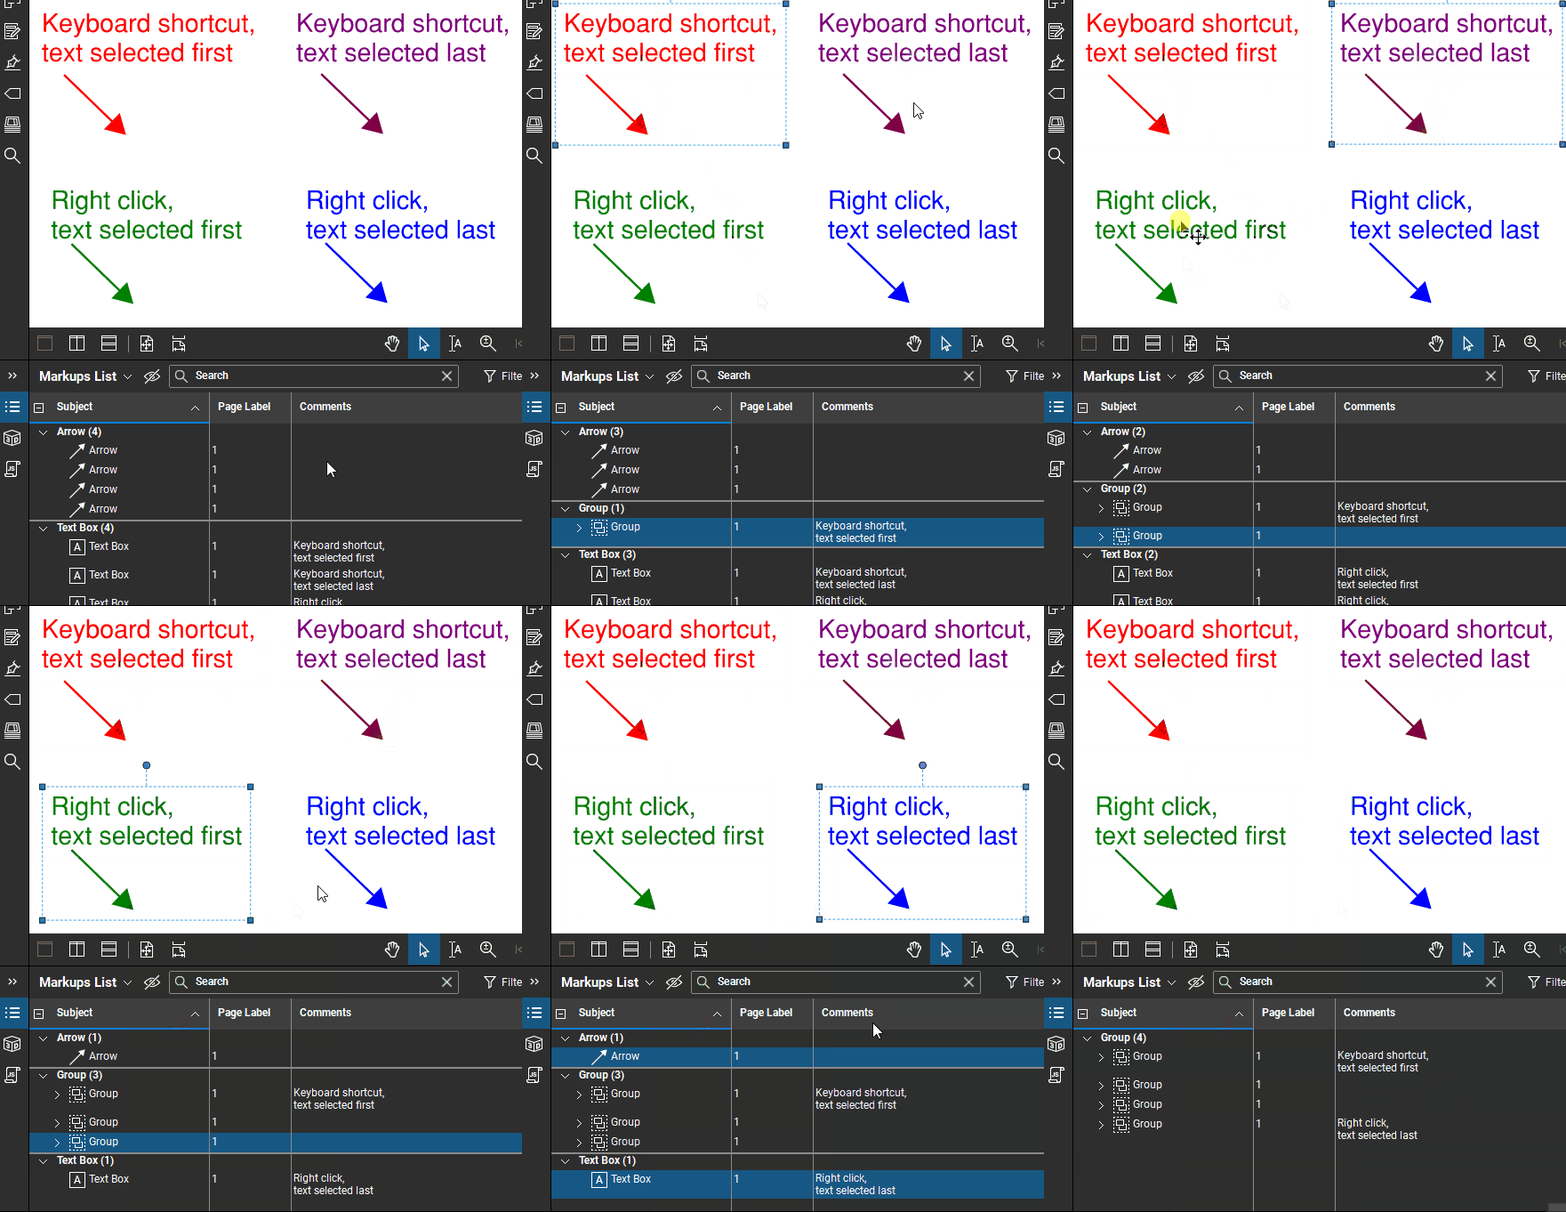
For the most part, the order you select the markups to be grouped does not matter. However, if there is text that you’d like to appear in the Comments column in the markups list, selection order and grouping method will affect this:
- If using the keyboard shortcut to group, select the text first.
- If using the right-click menu to group, select the text last.
This may or may not be important to you, but I wanted to throw it out there.
Conclusion
That was a lot more information than my typical Tuesday Tidbits. I hope you stuck with it and learned a few things along the way.
Is there anything about grouping that I left out? Is there anything about grouping you feel you should be able to do, but can’t? Let me know in the comments!

I knew about half of these details Liz. Thank you for filling in the blanks!
That’s awesome! I’m so glad you learned something!
There is something preventing me from grouping a certain section of my drawing, everything else does but group is not an option for this section, nor copy and past
There are two things I know of that would prevent you from grouping. The first one is that you cannot group a Cloud+ markup. The second is that you can’t group locked markups. Locked markups could be locked by you, they could be text output that results from printing to PDF from AutoCAD, or you might be in session and someone else’s markups got selected along with your own.
Recently when I group objects Bluebeam seems to think I want to zoom in on that grouping. What did I change to cause this to happen?
I am trying to create a group object with a textbox, line, square, and diamond. I order the objects so the line is in front, followed by text, diamond, then square. Then I group. When I copy paste my group, or add it to my tool chest and try to use it, the order of the objects changes, my line that should be in front, ends up behind the square. Is there a way to stop this from happening?